Connect an Azure Subscription to Guardrails
Connect an Azure Subscription to Guardrails
In this guide you will connect a subscription to Guardrails.
This is the second guide in the Getting started with Azure series.
Prerequisites
Completed the previous guide: Prepare an Azure Subscription for Import to Guardrails.
Access to the Turbot Guardrails console with admin privilege.
Step 1: Login to Guardrails
Login to your Guardrails console and select the CONNECT option from the home page.
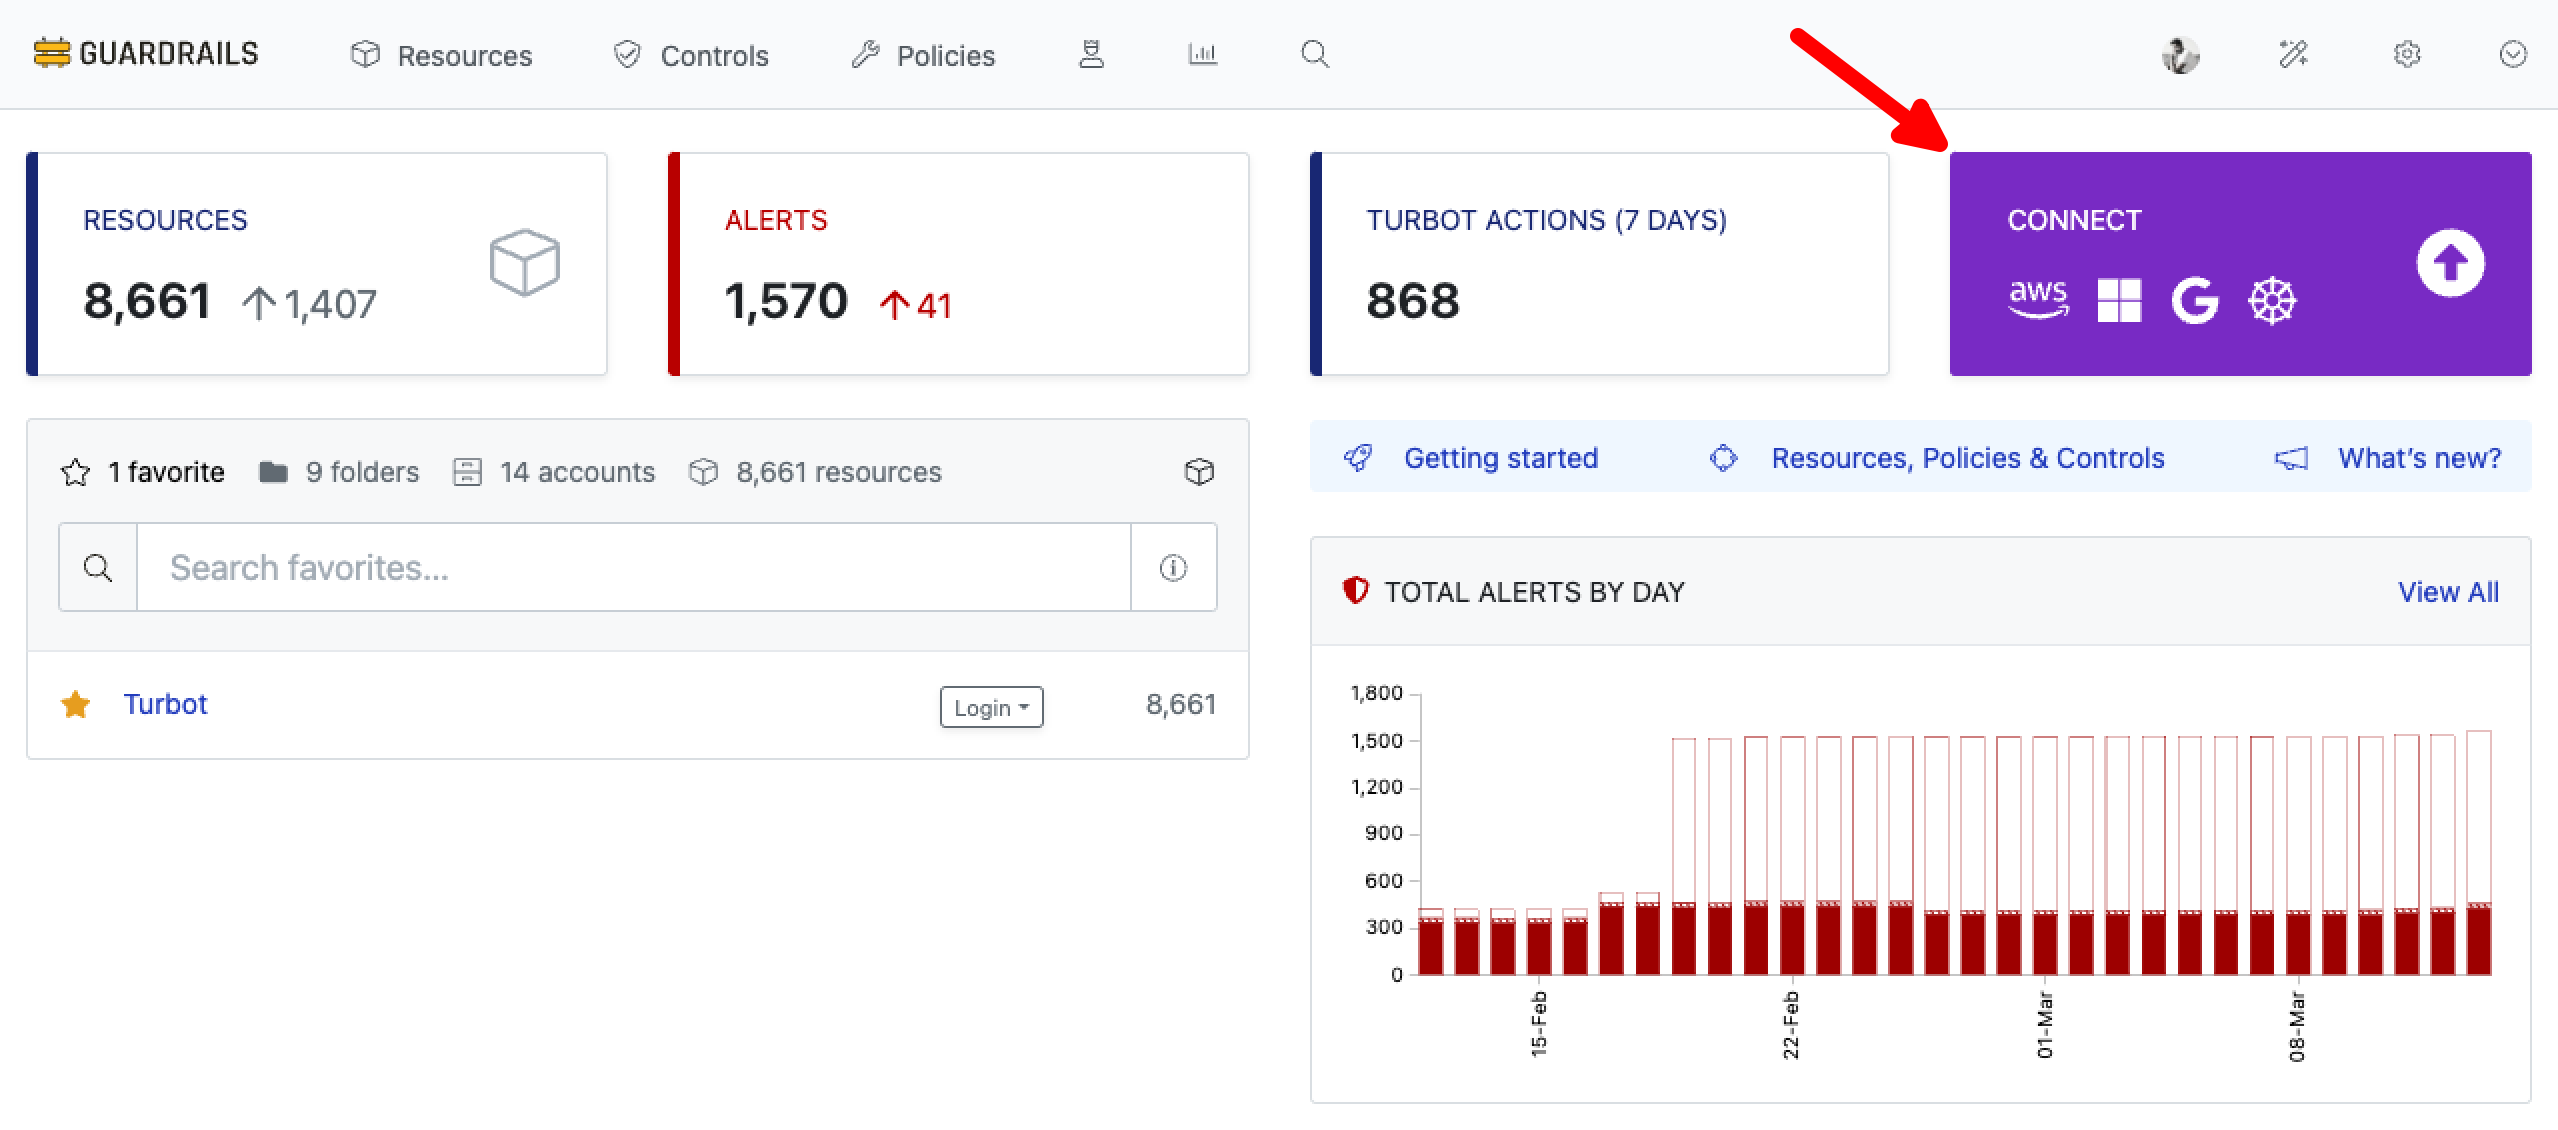
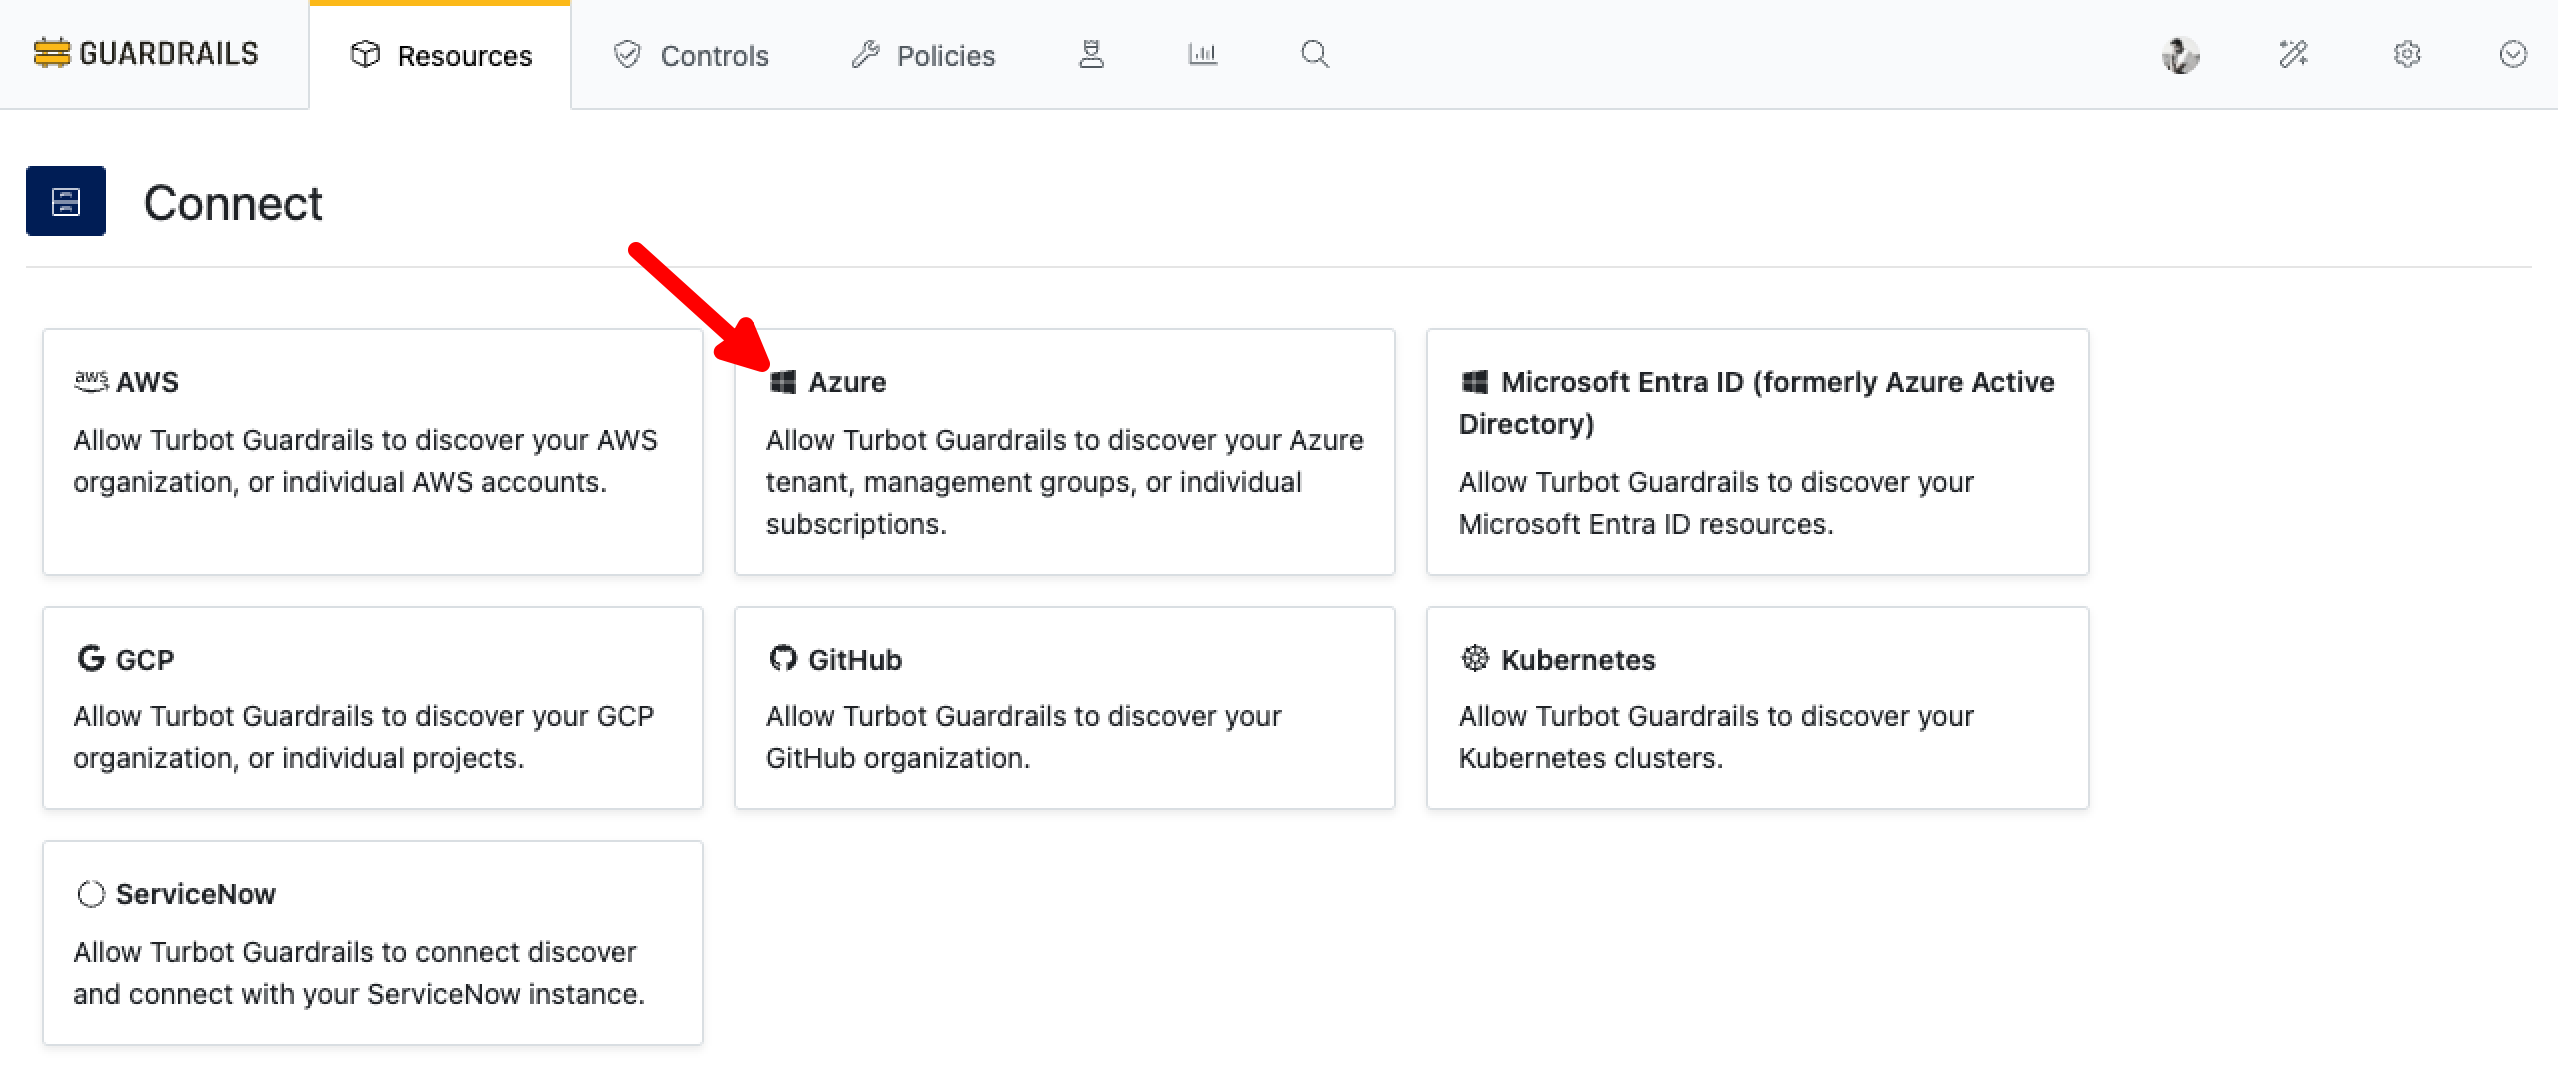
Select Azure.
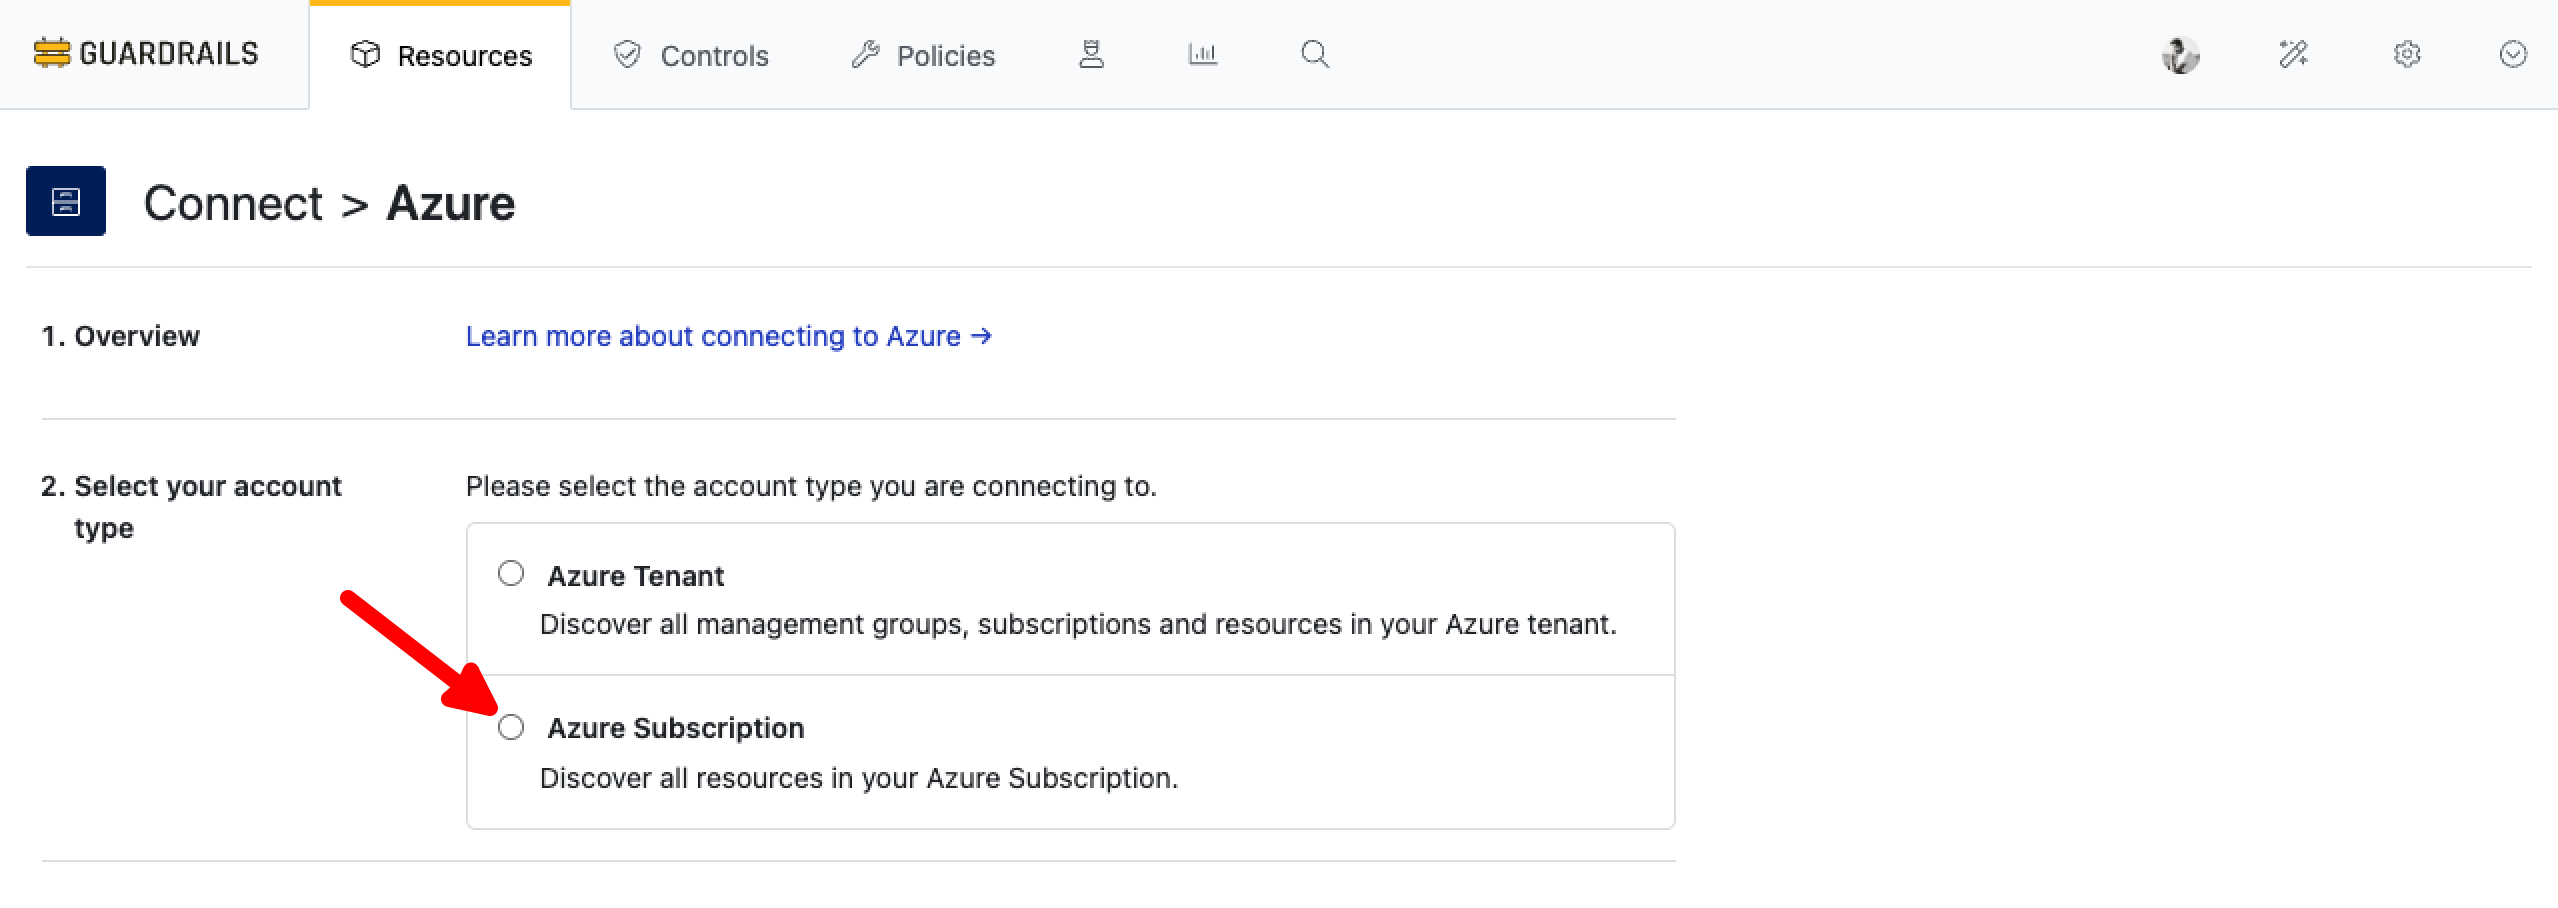
Step 2: Select Azure Subscription
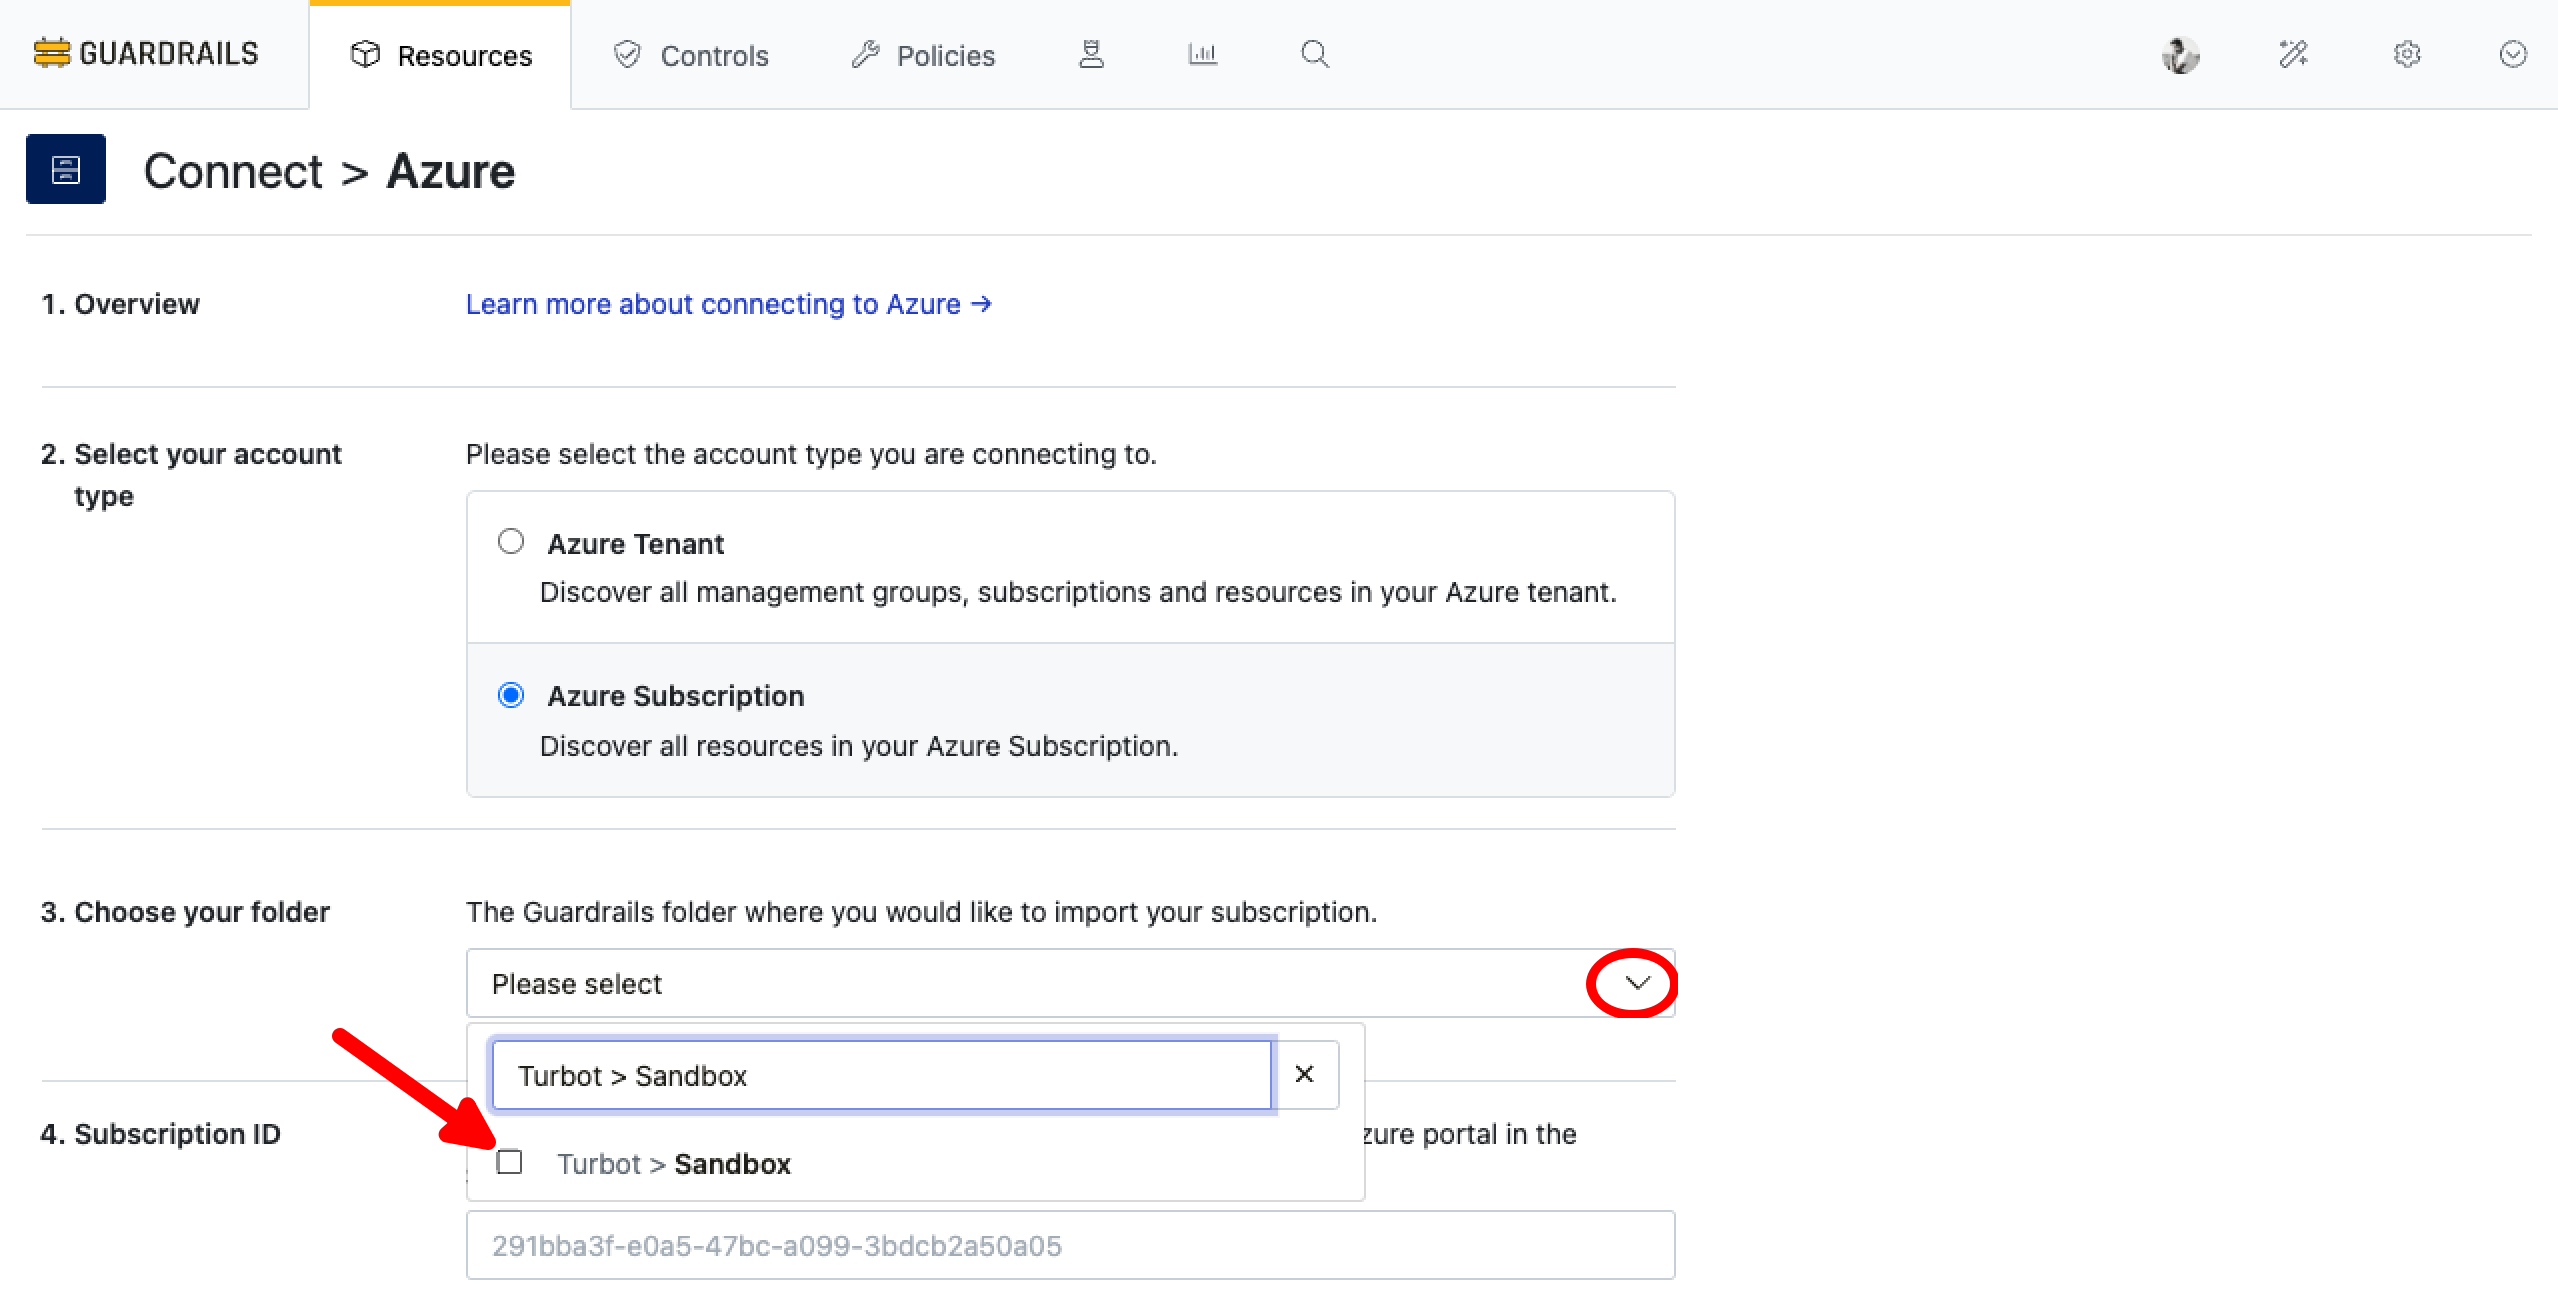
Step 3: Select location
Use the Parent Resource dropdown to select the Sandbox folder as the location to import the subscription.
Note: If the Sandbox folder does not exist in your workspace, you’ll need to create one.
This folder is commonly used for testing, isolation, or non-production accounts.
Refer to the Create Folder Guide for steps on how to create a folder in Guardrails.
Step 4: Enter details
If you forgot to save all these details when completing the first guide, you can find them in the Azure portal as follows:
| Parameter | Location |
|---|---|
| Subscription ID | The Home > Subscriptions page has your Subscription ID. |
| Tenant ID and Client ID | The Home > App registrations page has Directory (tenant) ID and Application (client) ID. |
| Client Key | If you forgot to save the secret's value created earlier, go to Home > App registrations > YOURAPPNAME > Certificates & secrets to create a new one. Use the Value (not the Secret ID). |
Select your environment (likely Global Cloud).
Select Connect.
Step 5: Observe progress
Wait for the progress bar to complete. The time this takes will depend on how many resources are in the account; it is normal for the progress bar to fluctuate in size as new types of resources are discovered.
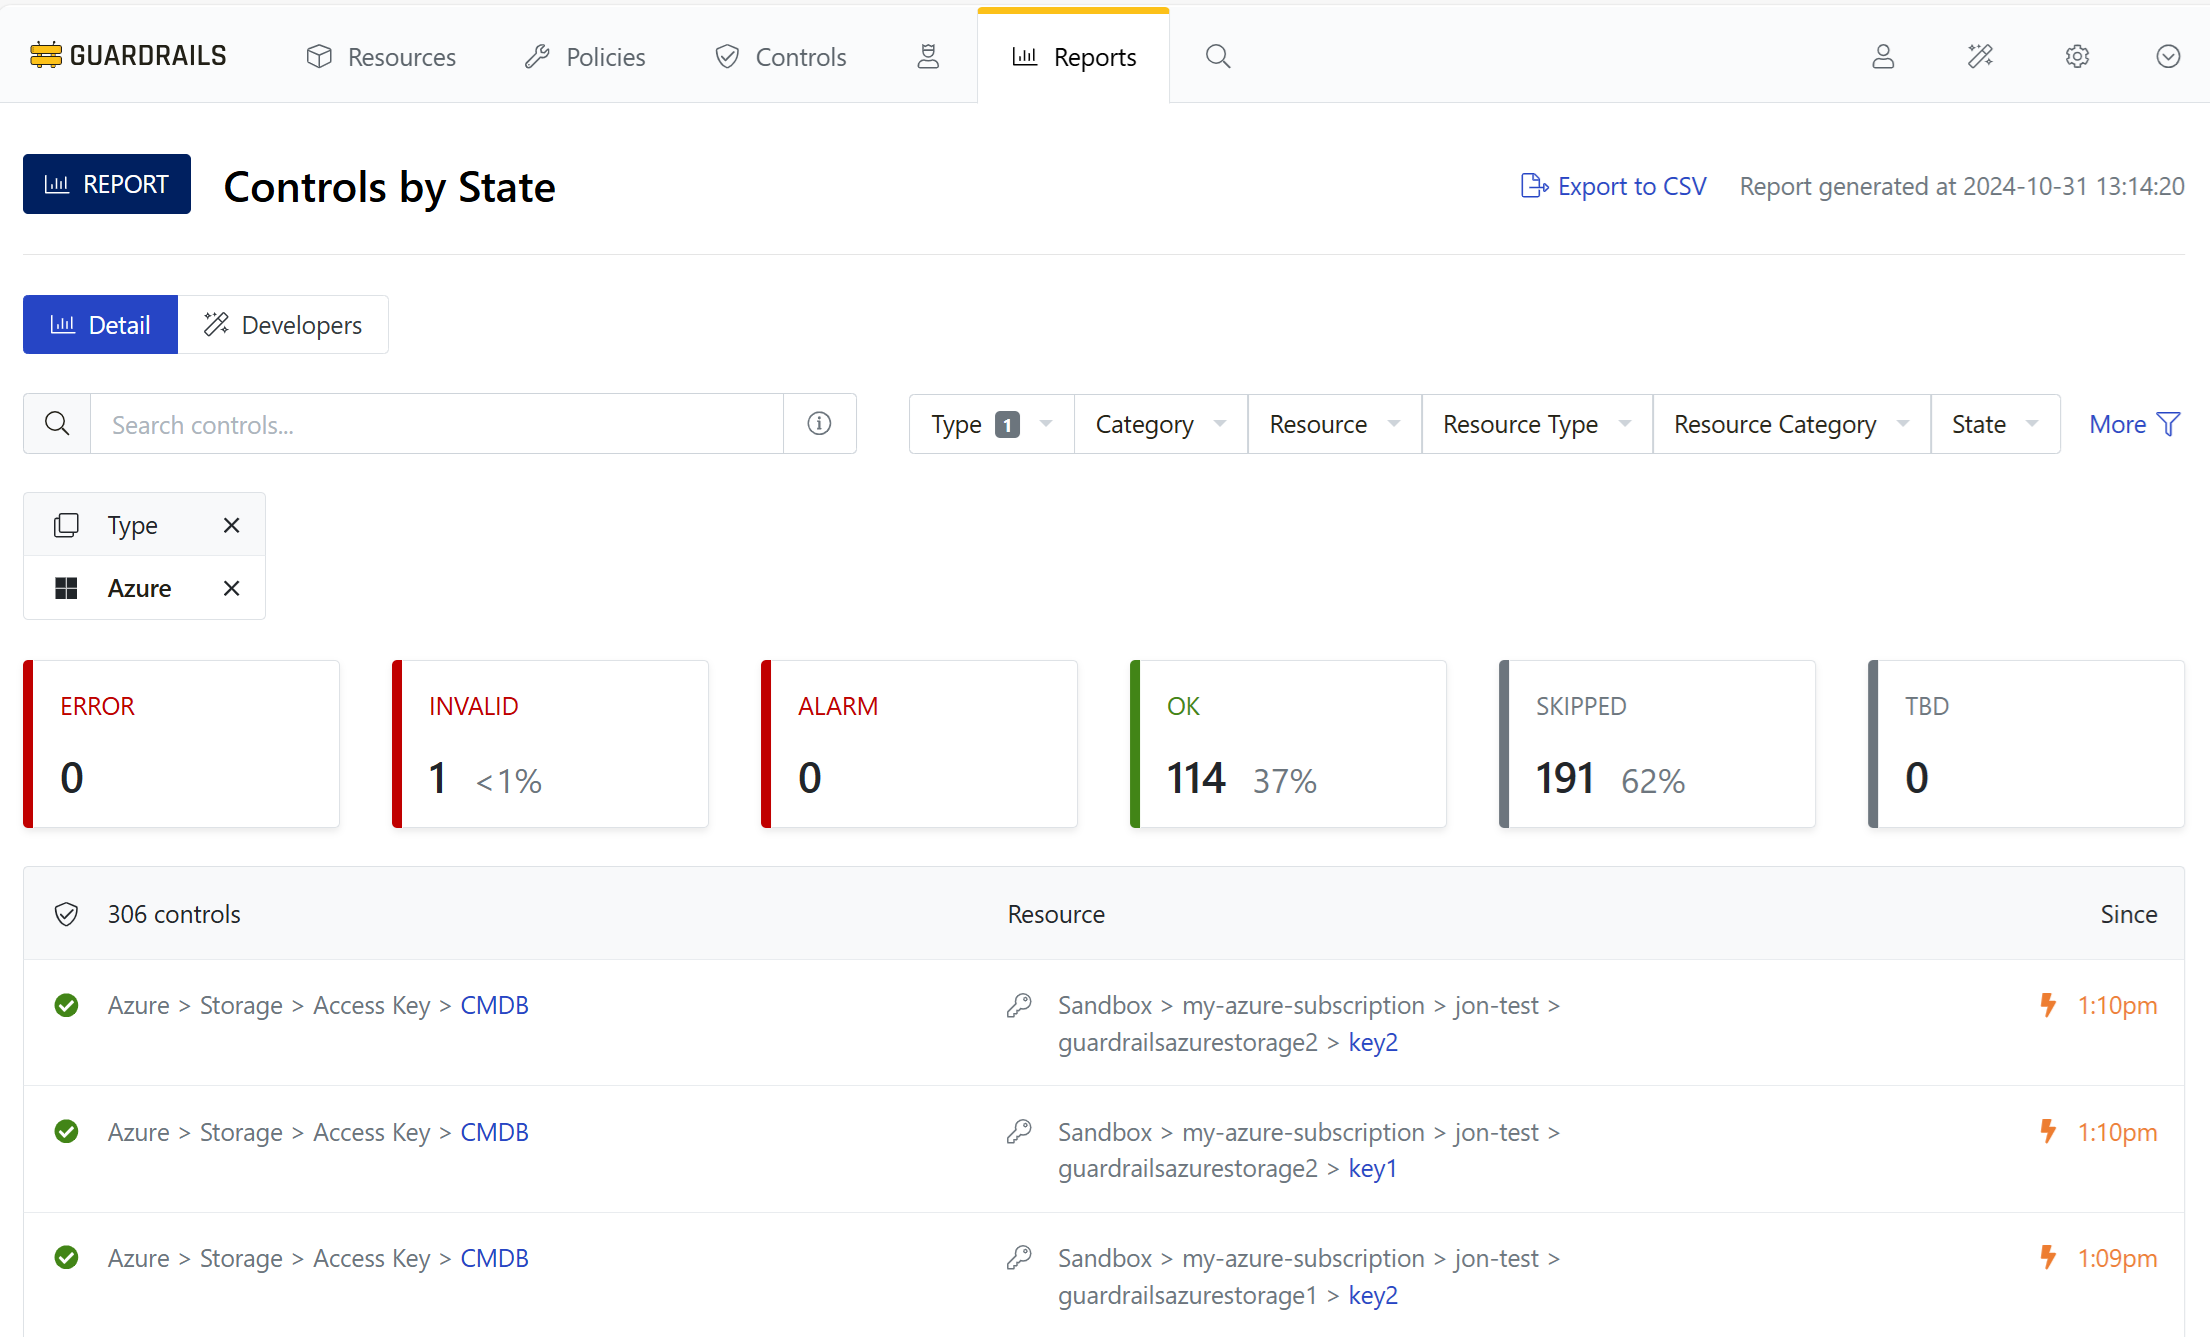
Step 6: View Controls by State
Select Reports from the top navigation menu. Type controls into the Search reports… field to show only reports with the word "controls" in their name. Select the Controls by State report from the list.
Step 7: Configure report filters
From the filter bar, expand the Type dropdown. Then select the checkbox next to Azure to limit the report to only show Azure controls.
Bookmark the Controls by State report, you’ll need it in subsequent guides.
Step 8: View the report
Review the status of your controls for Azure. Alarm, OK, Skipped, and TBD are all common and normal states to see in your subscription.
[!IMPORTANT] The controls in
ErrororInvalidstates must be cleared before moving further into these guides. It takes few mins depending on various factors. We suggest to wait and report to Turbot support, in case these errors are not cleared up automatically.
Step 9: Review
In this guide you successfully imported an Azure subscription into Guardrails.
Next Steps
In the next guide we’ll see how Guardrails monitors cloud events and reacts to resource changes.
Progress tracker
- [x] Prepare an Azure Subscription for Import to Guardrails
- [x] Connect an Azure Subscription to Guardrails
- [ ] Observe Azure Resource Activity
- [ ] Enable Your First Guardrails Policy Pack
- [ ] Review Subscription-Wide Governance
- [ ] Create a Static Exception to a Guardrails Azure Policy
- [ ] Create a Calculated Exception to a Guardrails Azure Policy
- [ ] Send an Alert to Email
- [ ] Apply a Quick Action
- [ ] Enable Automatic Enforcement